Self-Signed Certificates for HTTPS on Local Dev on IIS
I always forget the exact process for this and end up faffing about Googling it. So I'm writing it down here for the next time.
First of all you want to open up Notepad as Administrator, open the file at c:\Windows\System32\drivers\etc\hosts
and add a line with the URL for your local site at the end
127.0.0.1 mysite.local
Then open up PowerShell as Administrator and run
$cert = New-SelfSignedCertificate -DnsName "mysite.local" -CertStoreLocation "Cert:\LocalMachine\My" -FriendlyName "My Local Site Certificate"
which creates the certificate in the Personal store. Then run
Export-Certificate -Cert $cert -FilePath "$env:TEMP\tempcert.cer" | Import-Certificate -CertStoreLocation "Cert:\LocalMachine\Root"
which copies the new certificate into the Root store. You need it in both places.
Then open up IIS and add a website
- Put a friendly name into Site name
- Set the local path to your site
- Under Binding set Type to https.
- If you've got more than one site running on 127.0.0.1 then you must check Require Server Name Indication.
- For SSL certificate, select the certificate you've just created in PowerShell
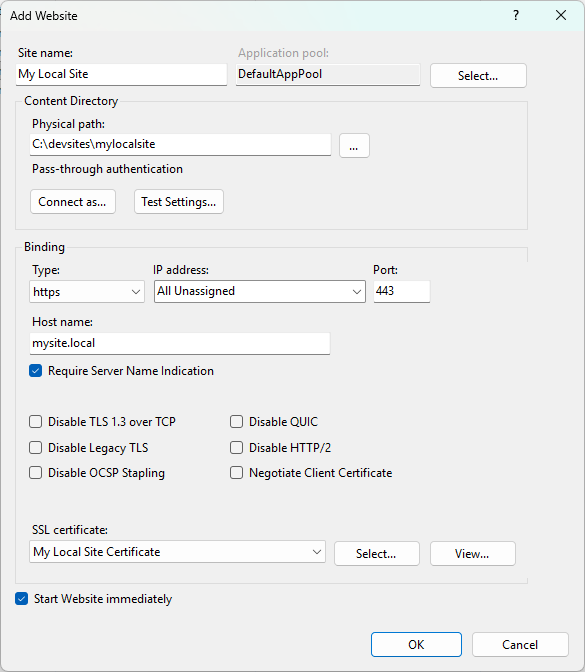
Click OK and you should be able to browse to your site using the URL
https://mysite.local
Comments
Join the discussionNo comments yet. Be the first to comment.